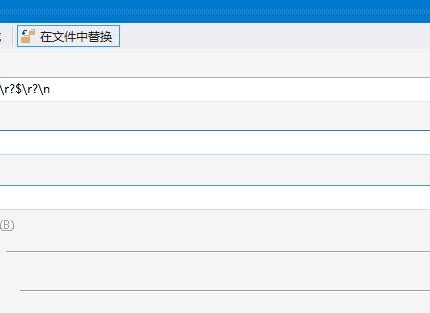
狂野の屠夫 2022 年 3 月 30 日 2024 年 4 月 6 日 WinForm / 心得体会 如何快速清除 Visual Studio 程序中源码空行及删除空行 日常编写代码中, 会遇到一些代码格式化的问题, 为了让代码能够看起来规范一点, 那么, 需要使用 vs 自带的格 …
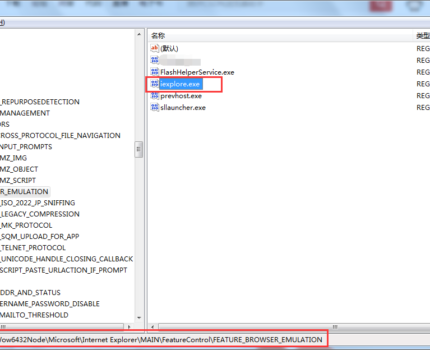
狂野の屠夫 2021 年 1 月 22 日 2021 年 1 月 22 日 WinForm / 心得体会 Webbrowser 控件设置 IE11 加载页面方法 不知道大家有没有出现过这种情况, 我 IE 浏览器明明就是 IE11, 为什么使用 webbrowser 控件加载 …
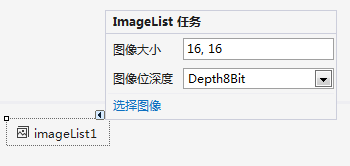
狂野の屠夫 2020 年 12 月 16 日 2024 年 4 月 6 日 WinForm / 心得体会 浅谈 ImageList 中索引超出问题 最近在进行代码合并的过程中, 遇到了 ImageList 控件运行到 SetKeyName 方法时, 提示 Ind …
狂野の屠夫 2018 年 5 月 28 日 2020 年 12 月 23 日 WinForm / 心得体会 给 ToolStrip 工具栏扩展一个 CheckBox 单选框类型按钮的方法 进行过 winform 开发的朋友,对 toolStrip 的工具栏肯定不陌生,但是,非常遗憾。 toolSt …
狂野の屠夫 2018 年 5 月 18 日 2023 年 6 月 13 日 WinForm C#窗体设计时界面修复方法整理 很多时候,打开别人的源码,由于 vs 版本的不一致,或多或少会发生设计时窗体打不开,出现各种各样的报错。 …